1 Geocomputation: An Introduction
This week’s lecture provided you with a thorough introduction into what is Geocomputation, outlining how and why it is different to a traditional ‘GIScience’ course. We set the scene for the remainder of the module and explained how the foundational concepts that you will learn about in the first half of term fit together to form the overall Geocomputation curriculum. There is no actual hands-on computer tutorial this week, but you will need to complete a few practical tasks in preparation for our future practicals.
1.1 Lecture recording
You can access the Lecturecast recording here: [Link]. The slides for this week’s lecture can be downloaded here: [Link].
1.2 Reading list
Essential readings
- Brundson, C. and Comber, A. 2020. Opening practice: Supporting reproducibility and critical spatial data science. Journal of Geographical Systems 23: 477–496. [Link]
- Longley, P. et al. 2015. Geographic Information Science & Systems, Chapter 1: Geographic Information: Science, Systems, and Society. [Link]
- Singleton, A. and Arribas-Bel, D. 2019. Geographic Data Science. Geographical Analysis. [Link]
1.3 Getting started
Over the next few weeks, we will be taking a closer look at many of the foundational concepts that will ultimately enable you to confidently and competently analyse spatial data using both programming and GIS software.
As you might guess, you will therefore be going on many learning curves over the coming weeks - some that may feel familiar (e.g. applying descriptive statistics) and others that are more challenging (e.g. learning how to write code and debug it as you find errors).
To help with this, we highly recommend that you try to stay organised with your work, including taking notes and making yourself a coding handbook. We would also suggest to list the different data sets you come across - and importantly, the scales and different projections you use them at - more on this over the next weeks. Finally, you should also make notes about the different spatial analysis techniques you come across, including the different properties they assess and parameters they require to run.
Furthermore, over the next nine weeks, you will learn how to plan, structure and conduct your own spatial analysis using programming – whilst making decisions on how to best present your work, which is a crucial aspect of any type of investigation but of particular relevance to your dissertation.
1.4 Software
This course primarily uses the R programming language. We briefly touch upon QGIS in the first few weeks to give you a basic foundation in spatial analysis alongside the range of spatial software available.
Note
Please follow the instructions below to install both R and QGIS onto your own personal computer. If you cannot install the software on your personal computer or you are not planning to bring your own laptop to the computer practicals, please refer to the UCL Desktop and RStudio Server section below. Please make sure that you have access to a working installation of both R and QGIS before the first hands-on practical session next week.
1.4.1 QGIS Installation
QGIS is an open-source graphic user interface GIS with many community developed add-on packages (or plugins) that provide additional functionality to the software. You can download and install QGIS on your personal machine by going to the QGIS website: [Link].
Note
We recommend installing the Long Term Release as this version should be the most stable, recent version.
After installation, start QGIS to see if the installation was successful and no errors are shown after start up.
1.4.2 R and RStudio Installation
R is both a programming language and software environment - in the form of RStudio- originally designed for statistical computing and graphics. R’s great strength is that it is open-source, can be used on any computer operating system, and is free for anyone to use and contribute to. Because of this, it is rapidly becoming the statistical language of choice for many academics and has a huge user community with people constantly contributing new packages to carry out all manner of statistical, graphical, and importantly for us, geographical tasks.
Installing R takes a few relatively simple steps involving two programmes. First there is the R programme itself. Follow these steps to get it installed on your computer:
- Navigate in your browser to your nearest CRAN mirror: [Link]
- If you use a Windows computer, click on Download R for Windows. Then click on base. Download and install R 4.1.x for Windows. If you use a Mac computer, click on Download R for macOS and download and install R-4.1.x.pkg
That is it! You now have installed the latest version of R on your own machine. However, to make working with R a little bit easier we also need to install something called an Integrated Development Environment (IDE). We will use RStudio:
- Navigate to the official webpage of RStudio: [Link]
- Download and install RStudio Desktop on your computer (free version!)
After this, start RStudio to see if the installation was successful and no errors are shown after start up.
1.4.3 UCL Desktop and RStudio Server
As an alternative to installing QGIS and R with RStudio on your personal device, there are some other options. Firstly, both programmes are available through Desktop@UCL Anywhere as well as all UCL computers on campus. In case of R, there is also an RStudio server version available which you can access through your web browser: [Link]
You should be able to log in with your normal UCL username and password. After logging in, you should see the RStudio interface appear.
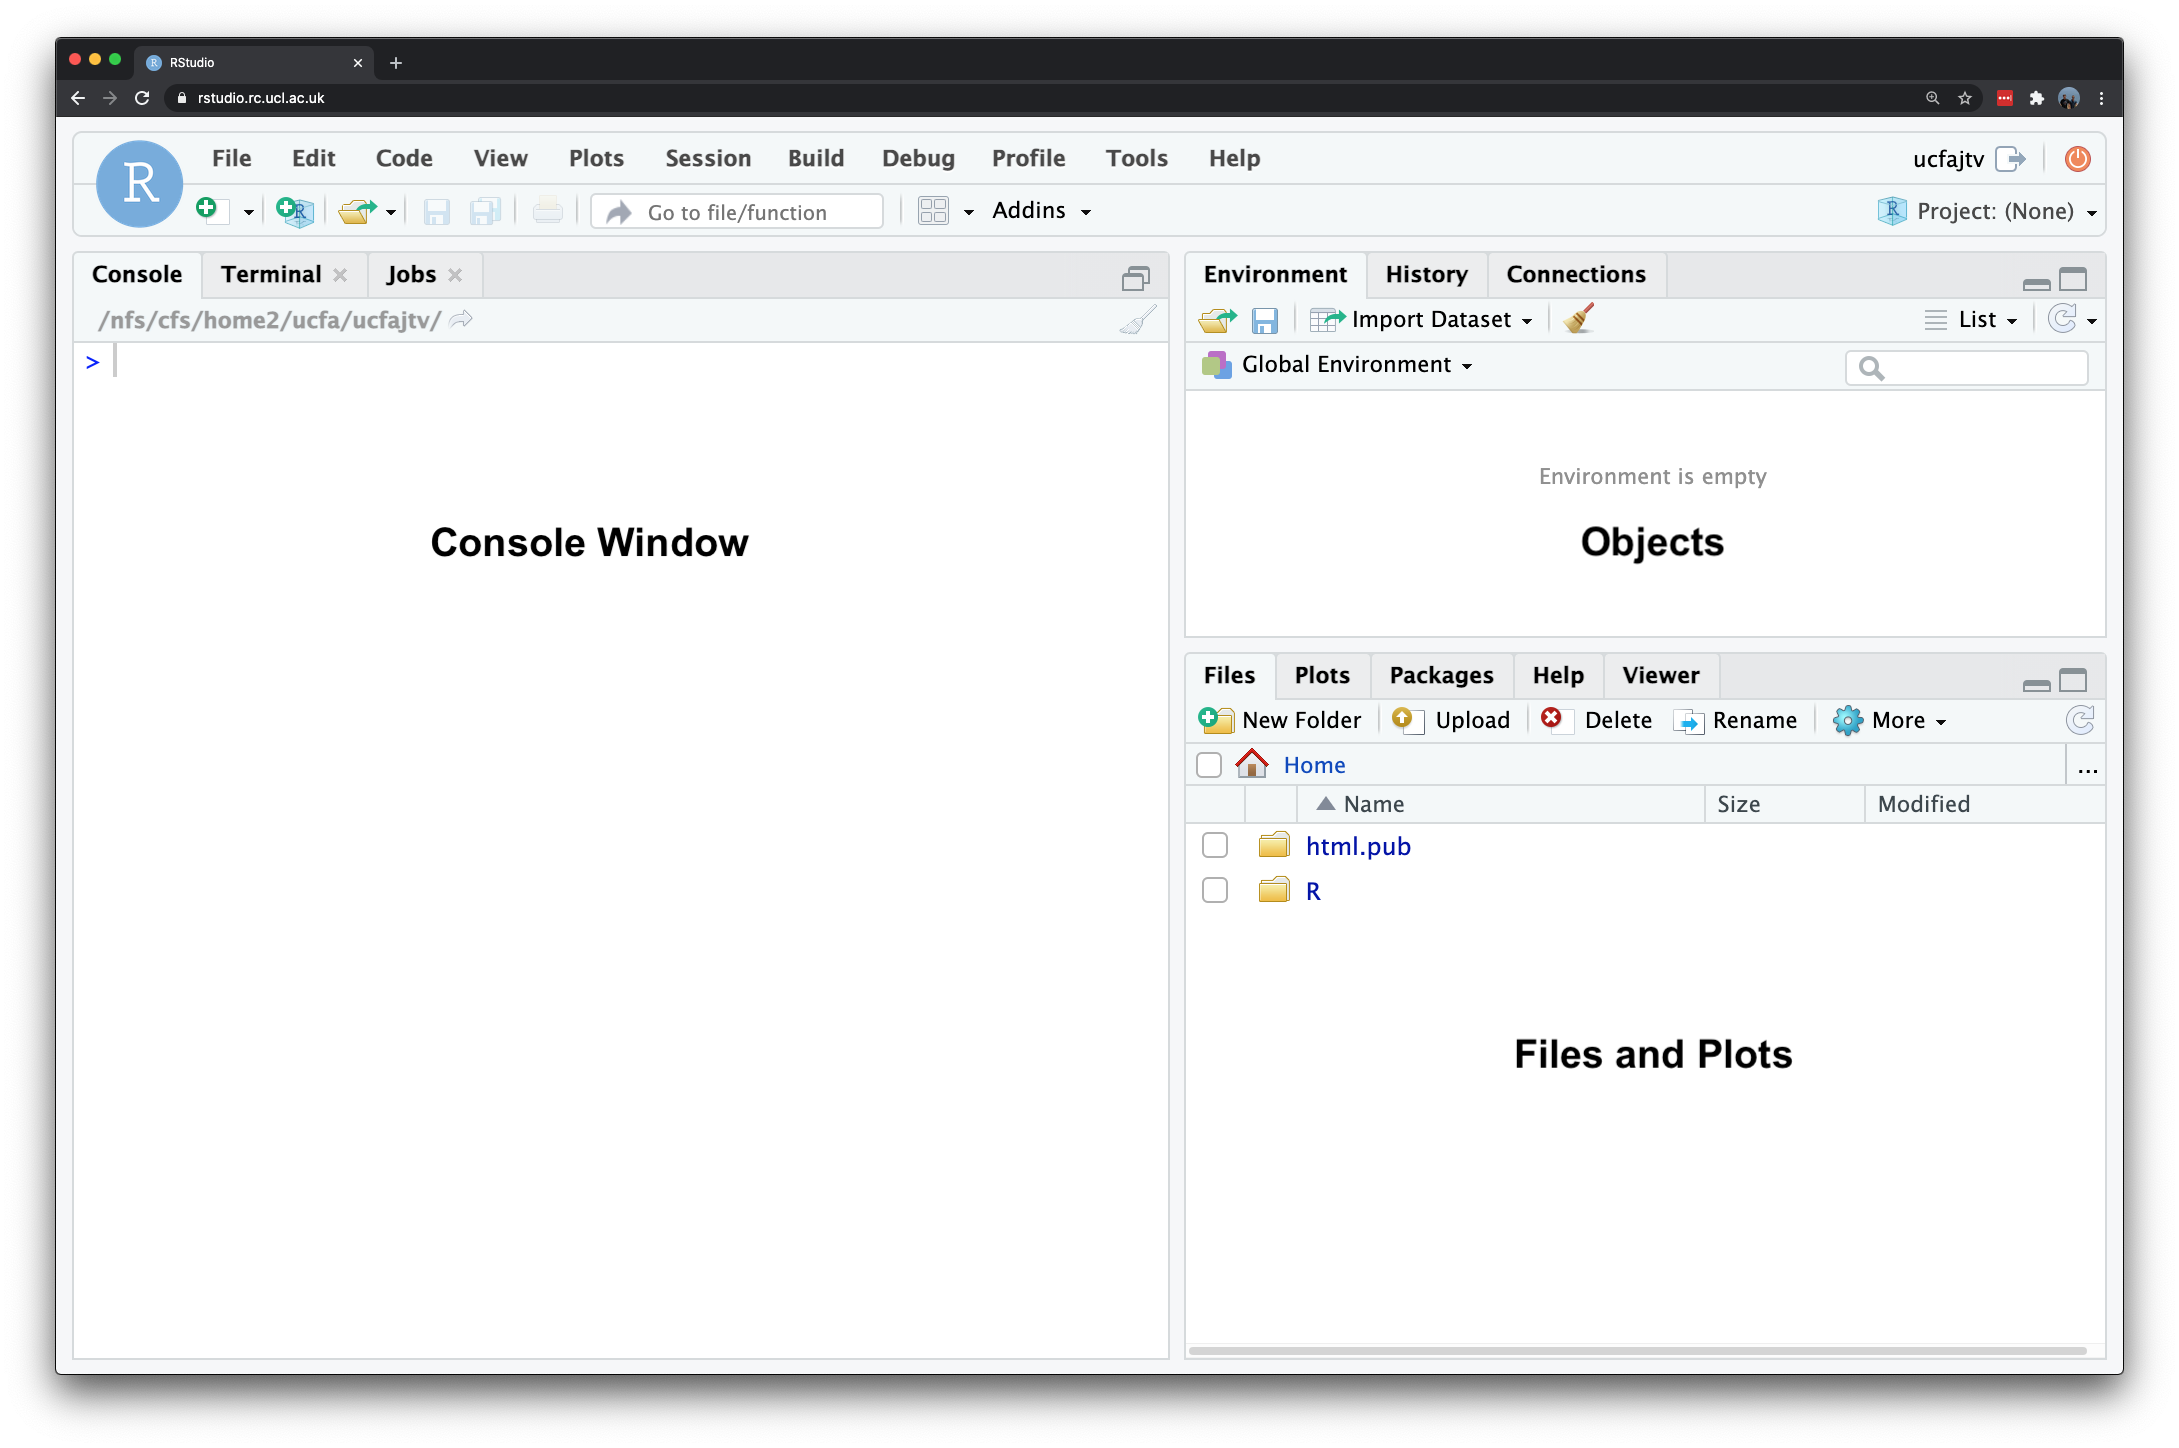
Figure 1.1: The RStudio Server interface.
Note
If it is the first time you log on to RStudio server you may only see the RStudio interface appear once you have clicked on the start a new session button. More importantly: if you are not on campus, RStudio server will only work with an active Virtual Private Network (VPN) connection that links your personal computer into UCL’s network. Details on setting up a VPN connection can be found in UCL’s VPN connection guides: [Link]
1.4.4 A note on ArcGIS
ArcGIS Pro (previously ArcMap) is the main commercial GIS software that you may have already used - or seen/heard about through other modules or even job adverts. We do not use ArcGIS Pro in our Practicals for several reasons:
- Computing requirements for ArcGIS Pro are substantial and it only operates on the Windows Operating System. For Mac users, using ArcGIS Pro (and ArcMap) would require using either a Virtual Machine or running a copy of Windows OS on a separate partition of your hard drive.
- It is proprietary software, which means you need a license to use the software. For those of us in education, the University covers the cost of this license, but when you leave, you will need to pay for a personal license (around £100 for non-commercial use) to continue using the software and repeat any analysis you have used the software for.
- Whilst ArcPro can use pure Python (and even R) as a programming language within it through scripts and notebooks, it primarily relies on its own ArcPy and ArcGIS API for Python packages to run the in-built tools and analytical functions. To use these packages, you still need a license which makes it difficult to share your code with others if they do not have their own ArcGIS license.
Recent developments in the ArcPro software, however, does make it an attractive tool for spatial data science and quantitative geography - it has cross-user functionality, from data analysts who like to use a tool called Notebooks for their code development, to those focused more on cartography and visualisation with in-built bridges to Adobe’s Creative Suite. We therefore do not want to put you off looking into ArcGIS in the future, but for this course, we want to ensure the reproducibility of your work.
Note
This also means that the analysis you will be doing for your coursework assignment must be completed in R and QGIS. Specific guidance on the coursework assignment and permitted software will be made available at the end of Reading Week.
1.5 File management
Establishing an organised file system, for both your data and your documents, is essential to working effectively and efficiently as a researcher, whether in Geocomputation, Spatial Data Science or any other application you might think of.
To get ready for our tutorials, we would recommend you to set-up a file management system as follows (either on your local computer, Desktop@UCL Anywhere or RStudio server).
- Create a
GEOG0030folder in yourDocumentsfolder on your computer (most likely inside a UCL or Undergraduate or Geography folder). - Next, within your GEOG0030 folder, create the following subfolders:
| Folder name | Purpose |
|---|---|
data |
To store both raw data sets and final outputs. |
slides |
To store a copy of the lecture slides. |
maps |
To save the maps you produce during your tutorials |
qgis |
To save any data related to QGIS. |
notes |
To store your notes, codebook, etc. |
- Within your
datafolder, create the following subfolders:
| Folder name | Purpose |
|---|---|
raw |
To store all your raw data files that have not yet been processed. |
working |
To store all your intermediate data files that have had some processing, but are not yet a final product. |
final |
To store all your final data files that have been processed and analysed, potentially ready to be mapped. |
- If you have have downloaded the lecture slides, move these into your
slidesfolder.
1.6 Before you leave
You should now be all ready to go with the computer practicals the coming week. That is it for this week!